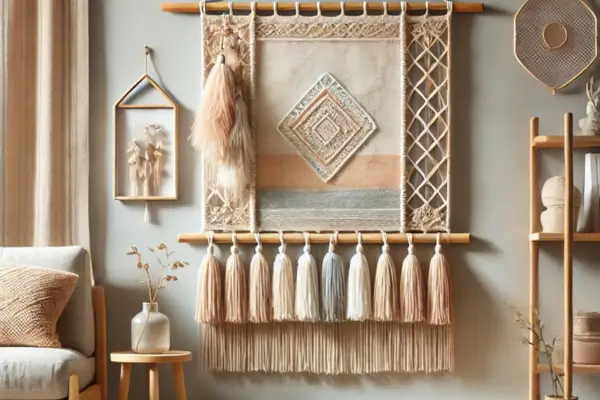
Creating a quilted wall hanging is a beautiful way to explore textile art while adding a personal touch to your home decor. This project combines creativity, texture, and color into a unique piece that reflects your style.
Whether you’re a beginner or an experienced crafter, this guide will walk you through the process step by step. With simple tools and materials, you can create a stunning quilted wall hanging that becomes a conversation starter in any room.
Let’s dive into the world of quilting and transform fabric scraps into a work of art!
Why Choose a Quilted Wall Hanging?
Quilted wall hangings are more than just decor—they celebrate craftsmanship. Here’s why they’re worth trying:
- Personal Expression : Mix and match fabrics to reflect your personality or complement your home’s color scheme.
- Beginner-Friendly : You don’t need advanced sewing skills to create something beautiful.
- Eco-Friendly : Use fabric scraps or upcycled materials to reduce waste.
- Versatile Decor : Perfect for living rooms, nurseries, or even as gifts for loved ones.
Materials You’ll Need
Before starting, gather these essential materials. This list is practical and accessible, allowing you to use items you already have at home or find easily.
Fabric Choices
- Cotton Fabric : Ideal for beginners because it’s easy to cut and sew. You can use leftover scraps from past projects, old bedsheets, or even cotton T-shirts you no longer wear. If starting fresh, choose fabrics with patterns and colors that coordinate well.
- Batting (Filling) : The batting gives thickness and texture to your wall hanging. If you don’t have batting, try using a thin blanket, thick felt, or even an old folded pillowcase. Choose something soft but sturdy enough to provide structure.
- Backing Fabric : This will be the backside of your work. Plain fabrics like old bedsheets or tablecloths work well. Choose something that matches the front or creates a bold contrast.
Tools
- Sewing Machine or Needle and Thread : If you own a sewing machine, great! But if not, hand sewing works perfectly too. Use polyester thread for added durability.
- Rotary Cutter and Self-Healing Cutting Mat : These tools ensure precise cuts, but if you don’t have them, a sharp pair of scissors will do.
- Quilting Ruler : Helps measure and align your cuts. If you don’t have a quilting ruler, a regular straight-edged ruler works fine.
- Fabric Scissors : Make sure they’re sharp to prevent fraying.
- Pins or Clips : To hold layers together while sewing.
- Iron and Ironing Board : An iron is essential for removing wrinkles and ensuring clean seams.
- Fabric Glue (Optional) : Useful for securing details without sewing.
Optional Embellishments
- Fabric Paint or Markers : Add colorful details or write inspiring phrases.
- Embroidery Thread : For decorative stitching that adds a special touch.
- Ribbons or Fringes : Include unique finishes for a more sophisticated look.
Step-by-Step Guide to Creating Your Quilted Wall Hanging
Step 1: Plan Your Design
Start by sketching your design on paper. Consider the following:
- Size : Decide how large you want your wall hanging to be. A common size for beginners is 18” x 24”.
- Pattern : Choose simple geometric shapes, floral motifs, or abstract designs.
- Color Palette : Select coordinating fabrics to create harmony in your piece.
Pro Tip: Use scrap paper to cut out shapes and arrange them on a table. This helps visualize the layout before cutting fabric.
Step 2: Cut Your Fabric Pieces
Using your rotary cutter and quilting ruler:
- Cut the fabric into squares, rectangles, or triangles based on your design.
- Ensure all pieces are slightly larger than needed to allow for seam allowances.
Pro Tip: Press each piece with an iron before sewing to remove wrinkles and ensure precision.
Step 3: Sew the Quilt Top
- Arrange the fabric pieces on a flat surface to match your design.
- Sew the pieces together in small sections, using a ¼-inch seam allowance.
- Press the seams open with an iron after each step to reduce bulk.
Once all sections are complete, sew them together to form the quilt top.
Step 4: Add Batting and Backing
- Layer your quilt sandwich:
- Place the backing fabric face down.
- Add the batting on top.
- Place the quilt top face up.
- Pin or baste the layers together to prevent shifting.
Pro Tip: Use safety pins every 4-6 inches to secure the layers firmly.
Step 5: Quilt the Layers Together
- Use a sewing machine to stitch along the seams of your design. This is called “stitch-in-the-ditch” quilting.
- Alternatively, add free-motion quilting patterns for a more artistic touch.
Pro Tip: If hand quilting, use a thimble to protect your fingers and maintain consistent stitches.
Step 6: Finish the Edges
- Trim the edges of your quilt to make them even.
- Attach binding strips around the perimeter:
- Fold the binding over the raw edge and sew it down.
- Miter the corners for a professional finish.
Pro Tip: Use contrasting fabric for the binding to make your design pop.
Step 7: Add a Hanging Sleeve
- Cut a strip of fabric (2.5 inches wide) and fold it in half lengthwise.
- Sew it to the back of the quilt near the top edge to create a sleeve for a dowel or rod.
Pro Tip: Insert a wooden dowel or copper pipe for a rustic or modern look.
Creative Ideas to Personalize Your Quilted Wall Hanging
- Embroidery Details : Add hand-stitched patterns or monograms for a personal touch.
- Fabric Paint : Use stencils or freehand designs to incorporate colorful accents.
- Layered Textures : Combine different fabrics like velvet, linen, or lace for a tactile effect.
- Seasonal Themes : Create holiday-specific designs, such as autumn leaves or winter snowflakes.
Tips for Success
- Always prewash your fabric to prevent shrinkage after quilting.
- Use a walking foot on your sewing machine to handle thick layers easily.
- Experiment with small projects first to build confidence.
Final Thoughts
Creating a quilted wall hanging is a rewarding project that combines creativity and functionality. Whether you’re decorating your home or crafting a heartfelt gift, this guide ensures you’ll achieve professional-looking results.
With patience and practice, you can turn fabric scraps into a stunning piece of textile art. Gather your materials, follow these steps, and let your imagination lead the way.
Ready to get started? Your next masterpiece awaits!


