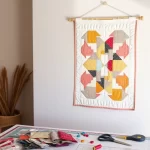
Making a quilted blanket combines creativity, functionality, and personalization in one cozy project. It’s a perfect way for beginners to learn quilting while crafting something beautiful and practical.
Quilting allows you to express your style with colors, patterns, and textures. Whether for gifting or home use, handmade quilts add warmth and sentimental value.
With basic tools and simple techniques, anyone can create a stunning quilt. Let’s guide you through the steps to make your first quilted blanket.
Start today and enjoy the satisfaction of creating a timeless, handmade piece. Your journey into quilting begins here!
Why Make a Quilted Blanket?
Creating your own quilted blanket comes with several benefits:
- Personalization – Choose your own colors, patterns, and designs to make a quilt unique to you.
- Cost-effective – Handmade quilts can be more affordable than store-bought ones, especially when using fabric scraps or upcycled materials.
- Sentimental value – A quilt can be a cherished family heirloom or a heartfelt gift for loved ones.
- Skill development – Quilting improves your sewing techniques, creativity, and patience over time.
Materials and Tools Needed
Before starting, gather the following materials:
Materials:
- Fabric for the quilt top (cotton or linen work well for beginners)
- Batting (padding) for warmth and softness
- Fabric for the quilt backing (choose a sturdy yet soft material)
- Binding fabric to finish the edges neatly
- Thread matching your fabric colors
- Iron-on interfacing (optional) to stabilize lightweight fabrics
Tools:
- Rotary cutter or fabric scissors for precise cutting
- Quilting ruler and measuring tape for accuracy
- Sewing machine or hand-sewing needle for stitching
- Pins and safety pins for securing layers
- Iron and ironing board to flatten fabric
- Quilting clips or binder clips for securing edges
- Marking chalk or fabric pencil to plan designs
Step-by-Step Guide to Making a Quilted Blanket
Step 1: Choose Your Quilt Design and Fabric
Start by deciding on the overall look of your quilt. Beginners often find it helpful to start with simple square or rectangular patterns.
Tips for Choosing Fabric:
- Pick at least three coordinating fabrics to add variety.
- Use pre-cut fabric squares (charm packs) for convenience.
- Stick to cotton fabric for easier handling and durability.
Step 2: Cut Your Fabric Pieces
Using a rotary cutter and quilting ruler, cut your fabric into equal-sized squares or rectangles. Common beginner quilt block sizes range from 5×5 inches to 10×10 inches.
Pro Tip: Press your fabric with an iron before cutting to ensure accuracy and neat edges.
Step 3: Arrange Your Quilt Pattern
Lay out the fabric pieces on a large, flat surface to determine your quilt’s pattern. Experiment with different arrangements before committing to a design. Taking a picture of your final layout can help you keep track of the pattern while sewing.
Step 4: Sew the Quilt Top
- Start by sewing rows of fabric squares together using a ¼-inch seam allowance.
- Press the seams open with an iron to reduce bulk.
- Sew the rows together to complete the quilt top.
- If using a patterned design, ensure alignment between blocks.
Step 5: Assemble the Quilt Layers
Layer the three quilt components:
- Backing fabric – Place it right side down on a flat surface.
- Batting – Lay the batting in the middle for cushioning.
- Quilt top – Place it right side up, aligning edges evenly.
Secure the layers with quilting pins or safety pins every few inches to prevent shifting.
Step 6: Quilt the Layers Together
Quilting secures the layers and adds texture. You can either:
- Hand quilt using small, even stitches in a running stitch pattern.
- Machine quilt by sewing along the seams or in a decorative pattern.
A simple stitch-in-the-ditch technique (stitching directly along the seams) is great for beginners.
Step 7: Bind the Edges
Binding gives your quilt a polished, finished edge.
- Cut binding strips (2.5 inches wide) and sew them around the edges.
- Fold the binding over the raw edge and hand-stitch or machine-stitch it down.
- Use corner miters for a professional look.
Step 8: Final Touches and Care Instructions
- Trim any excess threads and press your quilt.
- Wash gently with mild detergent for a soft and cozy feel.
- Store folded quilts in a dry place to prevent moisture damage.
Common Mistakes and How to Avoid Them
- Uneven seams – Use a quilting ruler and maintain a consistent seam allowance.
- Fabric shifting – Secure layers with plenty of pins or basting stitches.
- Skipped stitches – Use a fresh needle and quality thread for smoother sewing.
- Quilt puckering – Press each seam open and smooth out layers before stitching.
Creative Ideas for Quilts
If you want to add a special touch to your quilt, consider these ideas:
- Memory Quilt – Use fabric pieces from old clothes, baby blankets, or meaningful textiles.
- Patchwork Quilt – Mix different fabric prints and textures for a vibrant look.
- Seasonal Quilts – Make themed quilts for holidays or special occasions.
- Embroidered Quilts – Add names, quotes, or designs with embroidery stitches.
Final Thoughts
Making a quilted blanket is a rewarding and enjoyable process, especially for beginners. By following these steps and practicing basic quilting techniques, you’ll be able to create a beautiful and functional piece that can be cherished for years. Whether you’re making it for yourself or as a gift, a handmade quilt is always special.
Start your quilting journey today and enjoy the art of crafting something warm and meaningful!


