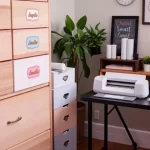
How to transform old furniture is a powerful approach to refresh your home while embracing sustainability and creativity.
Upcycling gives new purpose to worn or outdated pieces, reducing waste and adding style at the same time.
With simple tools and vision, you can repaint, rebuild, or redesign furniture to match your space and personality.
From modernizing a dresser to turning a door into a table, your options are limitless and affordable.
In this guide, you’ll learn how to upcycle furniture step by step and create functional, modern pieces with lasting value.
Why Upcycling Furniture is a Smart Choice
Upcycling old furniture offers several key benefits:
- Eco-Friendly Solution – Reduces landfill waste and promotes sustainability.
- Budget-Friendly – Saves money by repurposing existing materials instead of buying new furniture.
- Creative Freedom – Allows you to personalize pieces with custom colors, finishes, and designs.
- Higher Quality Than Mass-Produced Pieces – Older furniture is often made from solid wood, making it more durable than many modern, factory-made alternatives.
- Unique and Stylish – Transforms everyday furniture into one-of-a-kind statement pieces.
Essential Tools and Materials for Upcycling
Before starting your upcycling project, gather the following tools and materials:
Basic Tools:
- Sandpaper or electric sander
- Paintbrushes or foam rollers
- Screwdriver and pliers (for disassembling parts)
- Wood glue or nails
- Measuring tape
- Painter’s tape (for clean lines)
Materials:
- Eco-friendly paint or wood stain
- Sealant or varnish for durability
- Reclaimed wood or repurposed hardware
- Fabric or wallpaper (for added texture or design)
- Chalk paint or milk paint (for vintage and rustic finishes)
Step-by-Step Guide to Upcycling Old Furniture
Step 1: Choosing the Right Piece to Upcycle
Not all furniture pieces are suitable for upcycling. Look for:
- Solid wood furniture (durable and easier to work with than particleboard or MDF).
- Items with sturdy construction that only need surface restoration.
- Simple designs that can be easily modified.
Pro Tip: Avoid pieces with extensive water damage, mold, or major structural issues unless you have advanced carpentry skills.
Step 2: Preparing the Furniture for Upcycling
Before painting or refurbishing, follow these steps:
- Clean the surface – Remove dust, dirt, and old polish with a damp cloth.
- Remove hardware – Take off old handles, hinges, or drawers for easier refinishing.
- Sand the surface – Use sandpaper or an electric sander to smooth rough areas and remove old finishes.
- Fill any holes or cracks – Use wood filler to patch up imperfections, then sand again once dry.
Step 3: Painting and Finishing
Painting is a great way to modernize outdated furniture. Choose from the following options:
A. Chalk Paint (Matte, Vintage Look)
- Requires minimal sanding and priming.
- Creates a rustic or farmhouse aesthetic.
- Seal with wax or clear polyurethane for durability.
B. Spray Paint (Smooth, Modern Finish)
- Works well for metal or plastic furniture.
- Provides a clean, even coat with quick drying time.
- Use multiple thin layers for best results.
C. Wood Staining (Enhancing Natural Grain)
- Ideal for maintaining a natural, classic look.
- Apply a wood conditioner before staining for even absorption.
- Finish with a protective sealant.
Pro Tip: Always apply paint or stain in a well-ventilated area and allow proper drying time between coats.
Step 4: Adding Personal Touches
Customize your furniture with creative elements, such as:
- New Hardware – Replace old drawer pulls and knobs with modern or vintage alternatives.
- Fabric Inserts – Cover drawer fronts with decorative fabric or wallpaper.
- Stenciling – Add patterns or lettering for a unique touch.
- Two-Tone Painting – Use contrasting colors to highlight different sections of a piece.
Step 5: Sealing and Protecting Your Work
To ensure longevity:
- Apply a polyurethane or wax sealant to protect against wear and moisture.
- Let the furniture cure for at least 48 hours before use.
Creative Upcycling Ideas for Different Furniture Pieces
1. Transform a Dresser into a Kitchen Island
- Remove the top drawers to create open shelving.
- Repaint in a modern color scheme.
- Add hooks or racks for kitchen tools.
2. Turn an Old Door into a Dining Table
- Attach reclaimed wooden legs or metal hairpin legs.
- Sand and stain the surface for a rustic touch.
- Seal with a waterproof varnish.
3. Convert Wooden Crates into Stylish Bookshelves
- Stack crates vertically and secure them together.
- Paint or stain to match your home decor.
- Use as modular storage for books, plants, or decor items.
4. Repurpose a Wooden Chair into a Plant Stand
- Remove the seat and replace it with a large planter.
- Paint in bright colors for a fun, artistic look.
5. Use an Old Ladder as a Towel Rack
- Lean a wooden ladder against a bathroom wall.
- Sand and paint for a polished or distressed finish.
Common Mistakes to Avoid in Upcycling
- Skipping the Prep Work – Cleaning, sanding, and priming are essential for a smooth finish.
- Using the Wrong Paint or Sealant – Ensure your choice matches the material (wood, metal, plastic, etc.).
- Ignoring Safety Precautions – Work in a well-ventilated area and wear protective gear.
- Rushing the Drying Process – Allow proper drying time between coats for a professional-looking result.
Final Thoughts: Give Old Furniture a New Life
Upcycling furniture is an exciting, eco-friendly, and budget-conscious way to refresh your home decor while reducing waste. Whether you’re transforming a thrift store find or updating an outdated piece you already own, the possibilities are endless. With a bit of creativity, patience, and the right techniques, you can create stylish and sustainable furniture that reflects your personal style.
So, before throwing out that old chair or table, consider how you can upcycle it into something new and valuable!


