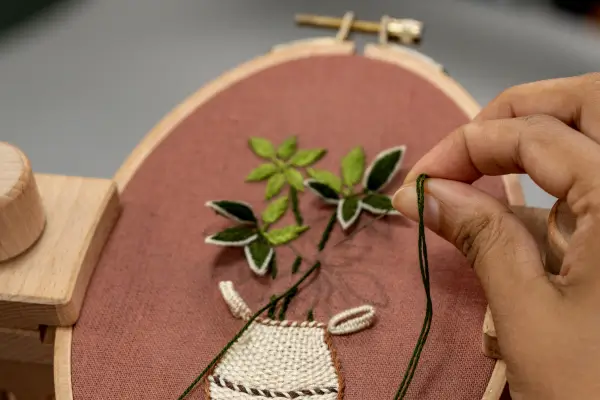
Creating stunning embroidery patterns is a fun and relaxing way to express creativity. It’s perfect for beginners looking to transform fabric into unique, handmade art.
With simple tools like needles, thread, and an embroidery hoop, you can start crafting beautiful designs. From floral motifs to geometric shapes, the possibilities are endless.
Learn basic stitches and techniques to bring your ideas to life. Let’s explore how to create embroidery patterns that inspire pride and joy.
Start stitching today and turn fabric into a canvas of creativity!
Why Start Embroidery?
Embroidery is more than just an old-fashioned craft—it’s a form of creative expression with endless possibilities. Here are some benefits of learning embroidery:
- Affordable and Accessible – You only need a few basic tools to get started.
- Relaxing and Therapeutic – Many people find embroidery to be a calming activity.
- Great for Personalization – You can customize clothing, accessories, and decor.
- Versatile Craft – Embroidery can be used on various fabrics and materials.
Essential Embroidery Supplies
Before starting your first embroidery project, it’s important to gather the right materials. Here’s what you’ll need:
1. Embroidery Hoop
An embroidery hoop holds the fabric taut while you stitch, making it easier to achieve neat and even designs. Hoops come in different sizes; beginners can start with a 6-inch hoop for easy handling.
2. Fabric
Choose a fabric that is easy to stitch on. Good options for beginners include:
- Cotton
- Linen
- Muslin
Avoid stretchy or slippery fabrics as they can be difficult to work with.
3. Embroidery Needles
Embroidery needles have larger eyes to accommodate thick embroidery threads. A good set of sizes 5 to 10 will cover most beginner projects.
4. Embroidery Thread (Floss)
Stranded cotton embroidery floss is the most common thread used in embroidery. It usually comes in six strands, which can be separated depending on how thick you want your stitches.
5. Scissors
A small, sharp pair of embroidery scissors makes it easy to trim excess thread with precision.
6. Water-Soluble Fabric Marker or Pencil
A fabric marker helps you draw designs on the fabric before stitching. These markings can be removed later with water or fading naturally.
Choosing Your First Embroidery Pattern
As a beginner, it’s best to start with simple patterns before moving on to intricate designs. Here are some beginner-friendly ideas:
- Floral Motifs – Small flowers, leaves, and vines
- Geometric Shapes – Circles, diamonds, and lines
- Letters and Monograms – Personalized initials
- Silhouettes – Simple animal or nature-inspired outlines
Many free embroidery patterns are available online, or you can create your own using a fabric marker.
Basic Embroidery Stitches Every Beginner Should Learn
To create stunning embroidery patterns, you should become familiar with a few fundamental stitches. Here are five of the easiest and most commonly used embroidery stitches:
1. Backstitch
A simple stitch used for outlining shapes and letters.
- Bring the needle up at point A.
- Insert the needle back into the fabric a short distance away.
- Repeat the process, ensuring the stitches connect in a continuous line.
2. Running Stitch
A basic stitch that creates a dashed line effect.
- Bring the needle up through the fabric.
- Insert it back down a short distance ahead.
- Repeat evenly across the design.
3. Satin Stitch
Used for filling in shapes with solid embroidery.
- Bring the needle up at the edge of the shape.
- Insert it back down on the opposite edge.
- Continue side by side until the shape is completely filled.
4. French Knot
A decorative stitch often used for small dots or floral centers.
- Wrap the thread around the needle twice.
- Insert the needle back into the fabric near the starting point.
- Pull tightly to form a knot.
5. Lazy Daisy Stitch
Perfect for flower petals and leaf designs.
- Bring the needle up at the starting point.
- Insert it back down close to the same spot, leaving a loop.
- Secure the loop with a small stitch at the top.
Step-by-Step Guide to Creating Your First Embroidery Pattern
Step 1: Choose a Design
Select a simple design that fits inside your embroidery hoop. If you’re unsure, start with a basic floral or geometric pattern.
Step 2: Transfer the Pattern to Fabric
Use a fabric marker or tracing paper to transfer the design onto your fabric. If you prefer, you can also print a pattern and trace it using a lightbox or window.
Step 3: Secure the Fabric in the Hoop
Place the fabric between the embroidery hoop’s two rings and tighten it securely so there is no slack.
Step 4: Thread Your Needle
Cut a piece of embroidery floss (about 18 inches long), separate the number of strands needed, and thread the needle.
Step 5: Start Stitching
Begin stitching your design using the stitches listed above. Work slowly and follow the pattern, ensuring even tension throughout.
Step 6: Finishing Touches
Once your embroidery is complete:
- Trim any excess threads.
- Remove visible fabric markings with water if needed.
- Press the fabric lightly with an iron to remove wrinkles.
- Frame it or sew it onto an item like a tote bag or pillowcase.
Tips for Improving Your Embroidery Skills
- Practice on scrap fabric before starting a real project.
- Use an embroidery hoop to keep your fabric taut.
- Work in good lighting to avoid eye strain.
- Keep stitches even by maintaining consistent thread tension.
- Experiment with different thread colors to create visually appealing designs.
Common Mistakes and How to Avoid Them
Pulling the thread too tight – Keep an even tension to avoid puckering the fabric.
Skipping a hoop – A loose fabric can make stitching harder and uneven.
Using too much thread length – Longer threads tangle easily, so stick to about 18 inches per cut.
Not securing the thread properly – Always tie off the thread at the back to prevent unraveling.
Final Thoughts
Embroidery is a fun and creative craft that anyone can learn. By starting with simple patterns and practicing basic stitches, you can quickly create beautiful embroidered designs. Whether you’re embellishing clothes, making gifts, or creating decorative pieces, embroidery is a skill that grows with time and patience.
Now that you know the basics, grab your supplies and start stitching your first embroidery pattern today!


